Make a draft sketch of your document
The first step takes place away from your computer – in a sense, since you are going to end up with a result on paper, you will begin by working with paper.
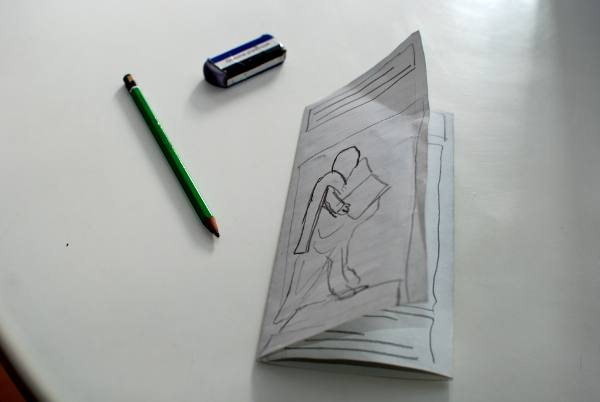
To sketch your brochure, begin with a sheet of white office paper (A4 or US Letter), and fold it in thirds. Although in your actual brochure you might wish the inside flap to be slightly narrower than the left front flap, so that it completely covers the inside flap when folded together, for this demonstration we are not going to bother with this detail.
Sketch some picture on the front flap, then check the result.
Some comments:
- At this early stage, don't hesitate to make many drafts, even with small pieces of paper, to test how the folds work. There are several ways of folding: the reading order – and therefore the layout – will vary depending on the specific content.
- Work with a pencil, paper, and eraser – this is a sketch, not a piece of art. Fast iterations will improve the result.
- If you don't like what you've done, don't hesitate to start over.
As soon as your comfortable with the way the folding works, you can start planning how you want to distribute the content on each flap.
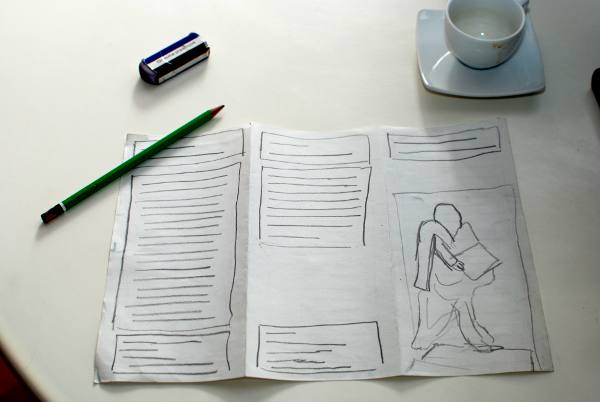
In general, you will probably want to use the three internal spaces for your primary content: the layout of these will be a sequential succession, left to right.
For the three other flaps (those on the outside of the folded brochure), their content depends on their visibility when the leaflet is closed:
- The front flap (which when unfolded will be the right-most panel of the page) will contain a large image, a title, and very brief introduction to the brochure's content.
- The middle panel will be the back of the folded brochure: it will often contain the contact information.
- The left panel is the one which is first seen as the brochure is opened – it will contain a summary of the content or some general information.
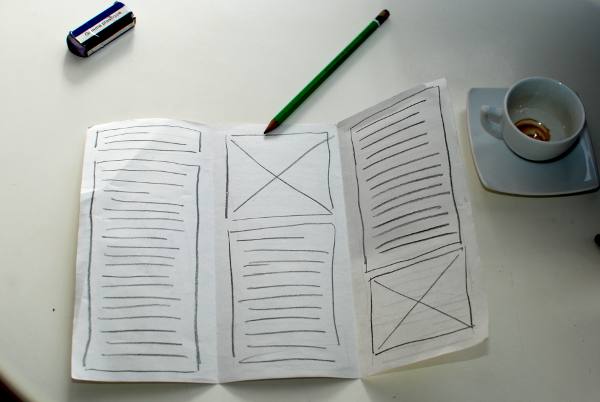
In the images here below you can see how we have drawn some boxes (frames) suggesting how the text and the images are arranged:
- We have drawn lines in the text boxes. You might want to write on top of it a description of the content it will contain.
- In the image frames we have drawn a cross or – when we thought it matters – a simple sketch.
For this guided tour of Scribus we will create a leaflet about Johannes Gutenberg, and how he became the inventor of the printing press. We will be using images and text from the Wikipedia webpage on Gutenberg, which may be used under the Creative Commons Attribution Share Alike license.
